Starter Kit Passport Broker Test Dataset
The Starter Kit Passport Broker docker image comes prebundled with a test dataset. The test dataset will be served via the Passport broker if no overriding database connection is provided. In this section, we will confirm that we can execute HTTP requests to a running network of Starter Kit Passport services and receive the expected responses.
Test HTTP Requests
Assuming you have a Starter Kit Passport Broker and Starter Kit Passport UI services running locally with all default properties, you may use the following HTTP requests to confirm if the services are running as expected.
Using your preferred API testing tool (e.g. Postman), issue the following HTTP request for the service info endpoint.
GET http://localhost:4500/ga4gh/passport/v1/service-info
You should receive a response with a status of 200, and a response body containing information about the service according to the Service Info standard:
{
    "id": "org.ga4gh.starterkit.passport.broker",
    "name": "GA4GH Starter Kit Passport Broker Service",
    "description": "Starter Kit implementation of a Passport Broker service, outlined in the GA4GH Passport specification. Manages researcher permissions to data and compute, and enables this information to be minted as JWTs and passed to downstream clearinghouses.",
    "contactUrl": "mailto:info@ga4gh.org",
    "documentationUrl": "https://github.com/ga4gh/ga4gh-starter-kit-passport-broker",
    "createdAt": "2022-04-28T09:00:00Z",
    "updatedAt": "2022-04-28T09:00:00Z",
    "environment": "test",
    "version": "0.0.2",
    "type": {
        "group": "org.ga4gh",
        "artifact": "passport-broker",
        "version": "1.0.0"
    },
    "organization": {
        "name": "Global Alliance for Genomics and Health",
        "url": "https://ga4gh.org"
    }
}
Visas in the Passport Broker
The list of Visas in the DB can be displayed by using a GET request
GET http://localhost:4501/admin/ga4gh/passport/v1/visas
You should see a response similar to the one below with a list of Visas that are currently in the broker.
[
    {
        "id": "670cc2e7-9a9c-4273-9334-beb40d364e5c",
        "visaName": "StarterKitDatasetsControlledAccessGrants",
        "visaIssuer": "https://datasets.starterkit.ga4gh.org/",
        "visaDescription": "Controlled access dev datasets for the GA4GH Starter Kit",
        "visaSecret": "87A3B5D68FD88197254D9889B4AAB"
    },
    {
        "id": "39e6e359-e8da-4193-92cc-2eed421fe729",
        "visaName": "DatasetAlpha",
        "visaIssuer": "https://datasets.starterkit.ga4gh.org/",
        "visaDescription": "First simulated dataset controlled by GA4GH",
        "visaSecret": "BF4BF43A157FB51B49F7AE13B7216"
    },
    {
        "id": "51db203b-ed6e-4de8-b196-011cae5cea15",
        "visaName": "DatasetBeta",
        "visaIssuer": "https://datasets.starterkit.ga4gh.org/",
        "visaDescription": "Second simulated dataset controlled by GA4GH",
        "visaSecret": "C5911B4A7BC2B343C6B7C55FED19D"
    },
    {
        "id": "4ed80481-dd73-4984-bee5-8e811a330102",
        "visaName": "DatasetGamma",
        "visaIssuer": "https://datasets.starterkit.ga4gh.org/",
        "visaDescription": "Third simulated dataset controlled by GA4GH",
        "visaSecret": "6893F3226CF379E52281CCB4584F7"
    }
]
You can further look into a specific visa by making a GET request to the visa
GET http://localhost:4501/admin/ga4gh/passport/v1/visas/670cc2e7-9a9c-4273-9334-beb40d364e5c
The response should look similar to the response shown below
{
    "id": "670cc2e7-9a9c-4273-9334-beb40d364e5c",
    "visaName": "StarterKitDatasetsControlledAccessGrants",
    "visaIssuer": "https://datasets.starterkit.ga4gh.org/",
    "visaDescription": "Controlled access dev datasets for the GA4GH Starter Kit",
    "visaSecret": "87A3B5D68FD88197254D9889B4AAB",
    "passportVisaAssertions": [
        {
            "status": "active",
            "assertedAt": 1652187600,
            "passportUser": {
                "id": "85ff5a54-48b9-4294-a91d-2be50bd2a77d"
            }
        }
    ]
}
Users in the Passport Broker
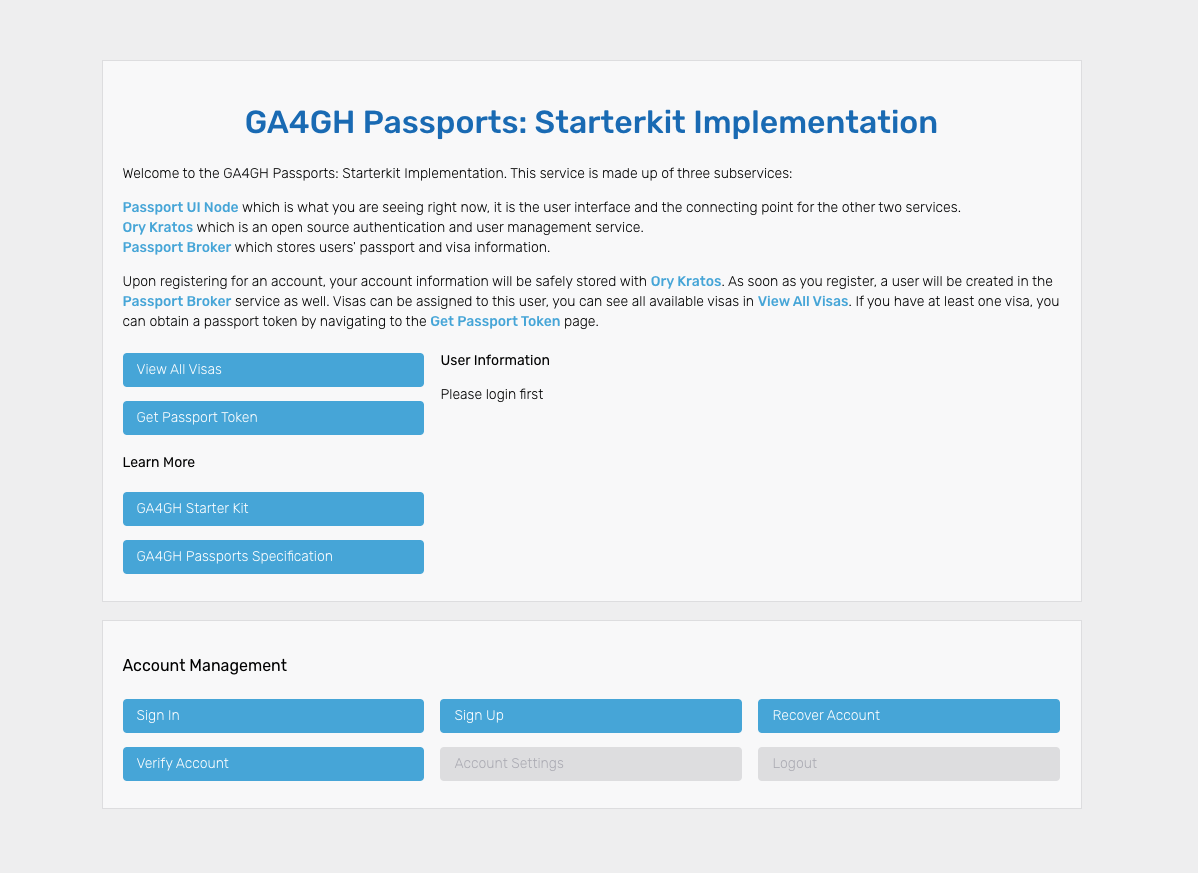
To create a new user, go to http://127.0.0.1:4455/welcome to enter the welcome page. Towards the bottom, under Account Management press Sign Up to create an account. After signing up, you should see your account information on the welcome page, under User Information.
Once the sign up is complete, a user in the passport broker service will also be created. Confirm the new user is created:
You can also request the list of users in the broker
GET http://localhost:4501/admin/ga4gh/passport/v1/users
Check the Visas of a User
You can further request information on the visas a specific user has by running the search below with the USER_ID replaced by the targeted user ID
GET http://localhost:4501/admin/ga4gh/passport/v1/users/<USER_ID>
Assigning New Visas to a User
To assign a new visa to a user you will need to make a PUT request
PUT http://localhost:4501/admin/ga4gh/passport/v1/users/<USER_ID>
In headers, include a key Content-Type with value application/json. In the body include a JSON object with two keys, first the "id" which should be the users ID as a string, and "passportVisaAssertions" which will be an array of visas. Make sure to replace the USER_ID with the real value. See an example body below:
{
    "id": "<USER_ID>",
    "passportVisaAssertions": [
        {
            "status": "active",
            "passportVisa": {
                "id": "670cc2e7-9a9c-4273-9334-beb40d364e5c",
                "visaName": "StarterKitDatasetsControlledAccessGrants",
                "visaIssuer": "https://datasets.starterkit.ga4gh.org/",
                "visaDescription": "Controlled access dev datasets for the GA4GH Starter Kit"
            }
        },
        {
            "status": "active",
            "passportVisa": {
                "id": "39e6e359-e8da-4193-92cc-2eed421fe729",
                "visaName": "DatasetAlpha",
                "visaIssuer": "https://datasets.starterkit.ga4gh.org/",
                "visaDescription": "First simulated dataset controlled by GA4GH"
            }
        }
    ]
}
Getting a Passport JWT (Json Web Token)
Back in the welcome page press Get Passport Token. On this page you should see your assigned visas, if no visas are assigned please look at the previous step. Select some visas, and then press Get Passport Token.
You can confirm the validity of your JWT token by visiting https://jwt.io/ and pasting the JWT token to examine its contents.
